Thursday, August 31, 2006

Here you can see the details of the trailer hitch. Incorporating the universal joint from the socket set. This gives the hitch vertical and horizontal movement but not twist (IE if one wheel goes over a bump). To allow for twist I elongated the hole where the bolt goes through holding the socket drive to the trailer. I then used a thin bolt so it was loose. To stop it all from vibrating I made up washers of old bike tube that act as a buffer. Posted by Picasa

I've got the Blues

Made some for refinements tot he trailer. I painted it which made a big difference to look of the trailer and I also added a rack to my bike. Having the rack allowed me to get rid of the extra pipe from the handle of the trailer to the seat. I used a universal joint from a socket set welded to a bracket to make the adapter. A pin allows for quick release. Posted by Picasa

Sunday, August 20, 2006

How to Turn a Golf Cart into a Bike Trailer.

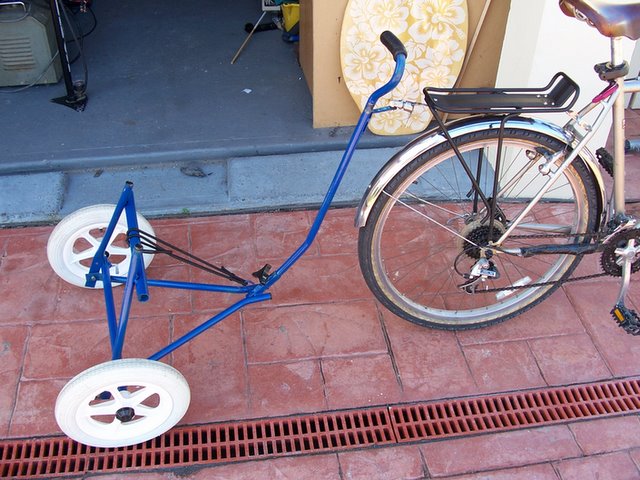
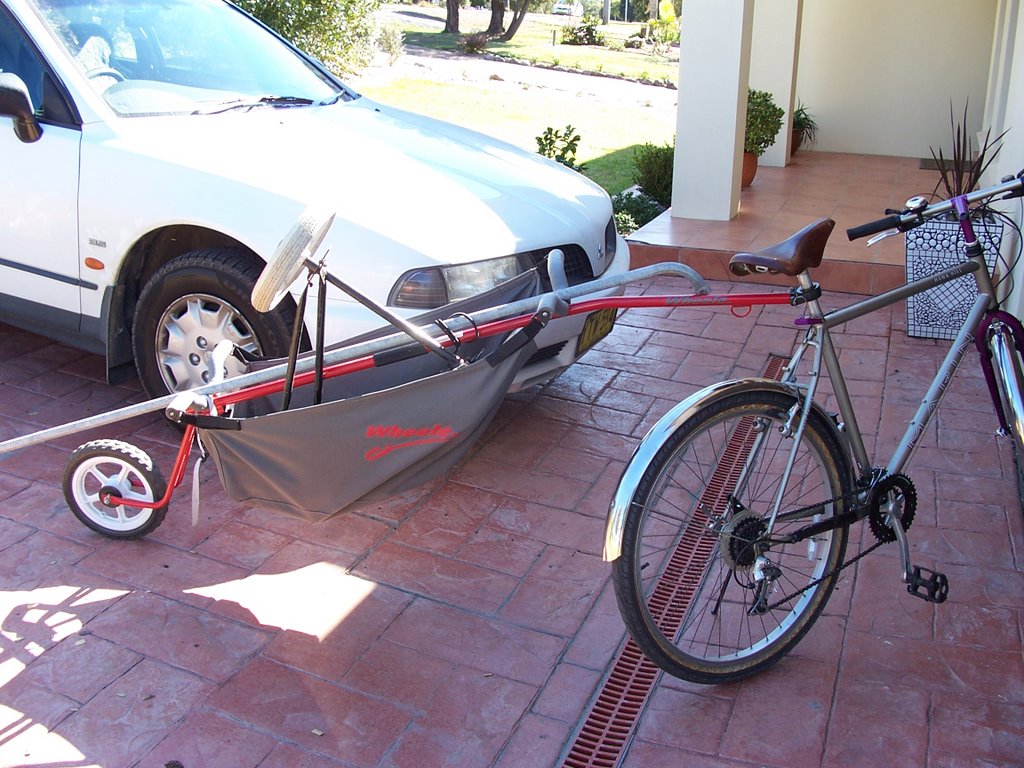
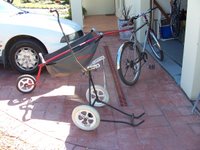
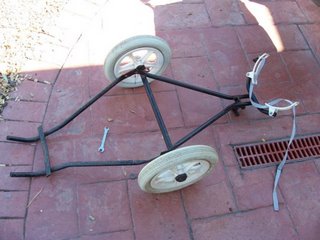
  1. Select the correct Golf Cart.
    Not being an enjoyer of chasing white balls around paddocks, to my limited knowledge it appears to me that there are two main styles of Golf Cart. One that is kind of a scissor type with the wheels held out on arms and the other a more simple type like the one pictured. The latter is the one these instructions apply to. I am not sure how lucky I was to get hold if this cart and if this type of cart is common but here goes. One benefit of this particular cart is that it came with pneumatic tires.

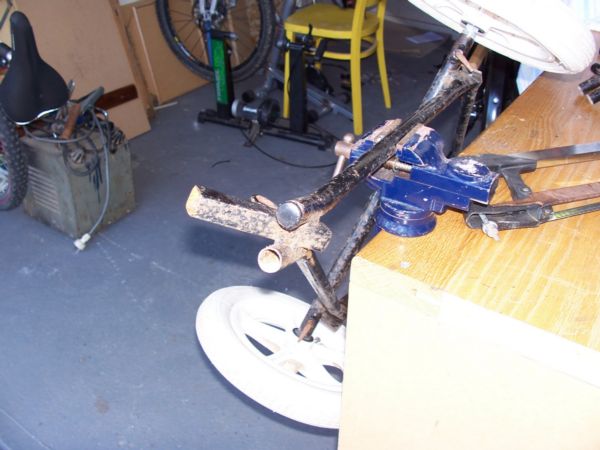
2. Unscrew the front triangle which uses the axle as a stop and screw it back on with the stop now being on top of the axle. At this point the front triangle will just flop
on the ground.


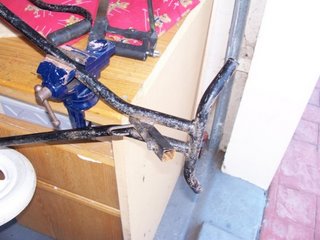
3. Now cut the ends off the cart these are the bits that hold the bag making sure you leave the handle and cross bar in place unless you plan to weld a new cross bar on later (which I did). I managed to reuse the plugs from the original ends to plug the newly sawn ends.


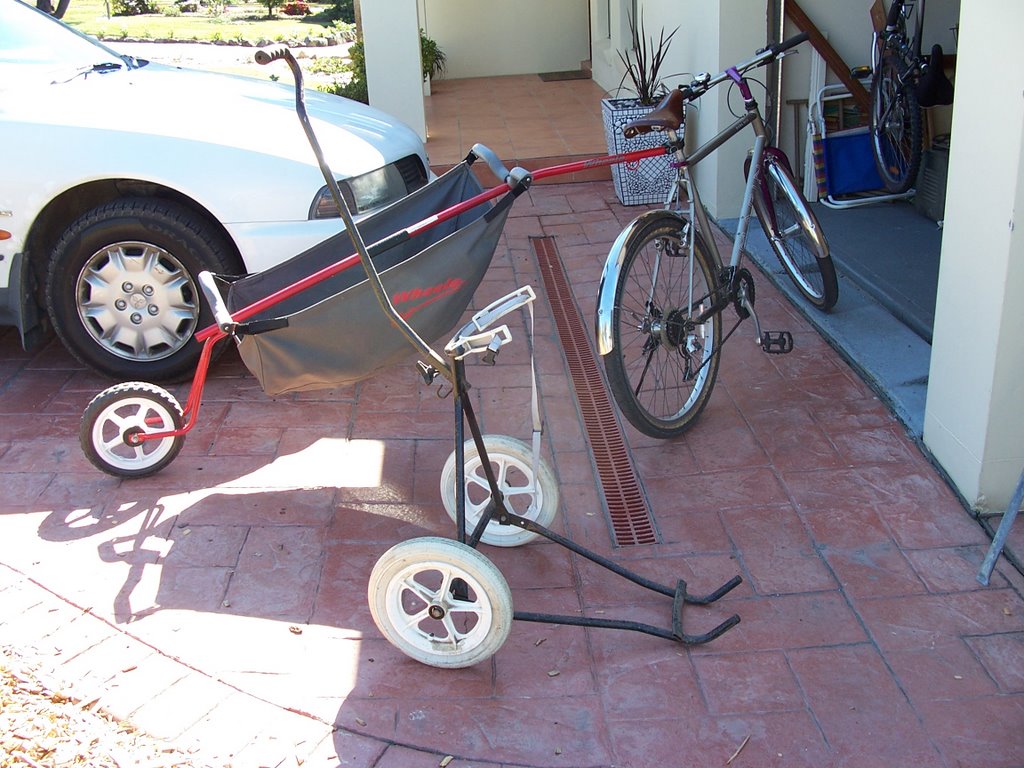
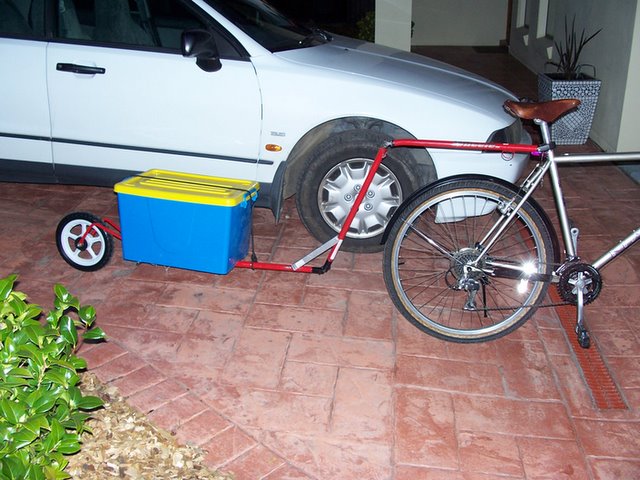
4. Now turn the buggy up side down and attatch the handle. I don't have any good photos but this picture of the final product will give you the idea. The handle ends up being in the perfect place (at least in my case) to attach to a pannier rack.


5. For the moment I have used my existing Wheele mount which consists of a swivel on the seat post. I plan in the future to place a rack on the bike and attach the trailer to that. I kept the handle on the buggy so it could be used as a cart when not attatched to the bike. I'll leave the attachment method to you bike up to you.


6. Load her up. I have just used a couple of bins I already had but will probably end up using one big bin. One advantage of the two smaller bins is if you only have one on the trailer you can actually fold the back of the trailer up making it short wheel based!
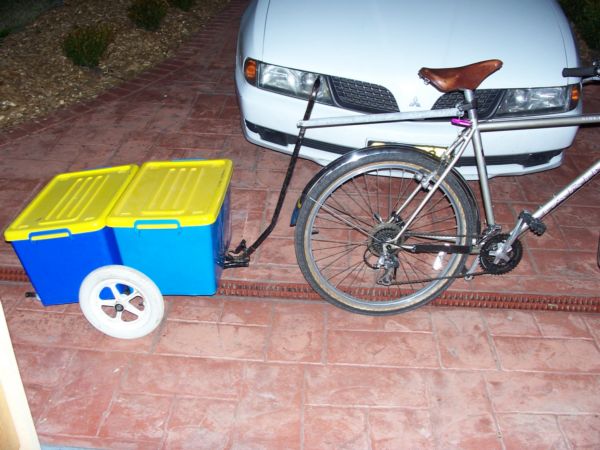
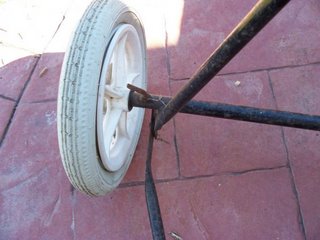
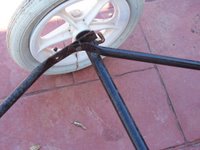
Trailer Number Three


I wasn't all that happy with the modified wheele, although I had never actually used it. The main problem I seen was the wheel base being too long and maybe it not being stable enough for large loads.
So the other day I was at the tip / recycling center, and spied an old Golf cart. Today Ros and I rode back out to tip and collected the golf cart after paying $5.00 and carted it home in the origional Wheele trailer.

Wednesday, August 16, 2006

Back from Shopping


Just got back from shopping
Notice I changed the mudguards to stainles after some negative feed back from the family on the black ones.

Saturday, August 12, 2006

The Original Wheelie bike trailers

This is what the trailer looked like before the conversion. This is actually the other trailer I own I'll be keeping this one as is. The other trailer was a lot longer than this designed for carrying a surf board. I don't think they make them any more. Posted by Picasa


Decided I need a trailer for the commuter after reading some of these inspirational stories like this guy moving house by bike http://michaelbluejay.com/bikemove/ and http://hpv.tricolour.net/vic/HPmove/index.html I already have a bike trailer well 2 to be exact but they weren't quite what I was after. So out came the hacksaw and welder and I converted the wheelie trailer into a more traditional bike trailer. Posted by Picasa

Monday, August 07, 2006

The First Steps

So yesterday I spent the afternoon giving the Marin a Wash and Polish. Gotta say except for a few scratches it came up pretty good. So this afternoon I road it over the 6 or 7 k's to Shane at Bikes at the Basin where we started to transform the Marin to a commuter. First off every commuter bike needs Mudguards. Even though it wasn't raining today the recent rain had left streams of water across the bike path and as a result on the ride over my back got wet and I ended up riding on the drier road, so on went a set of full steel mudguards. Then we added a stand and bell. The piece de resistance was the Leather "Bell" Saddle that Shane had salvaged from an old bike. Hmm not bad at all. I was a bit worried that the steel mudguards would rattle but the bike remained whisper quiet on the way home.

Next things is to organise some sort of rack. I was tempted to use a front basket but Shane was against the idea since it would interfere with gutter jumping etc. What do you think?


Posted by Picasa

The Marin

Shane from Bikes at the Basin sourced this Marin for the cause. Seems that it has hardly been ridden although early 90's vintage still has the plastic over the badges. I just screwed on some pedals I had lying around, pumped the road style tires up to 60 psi and went for a spin. WOW after riding my fully suspended very plush mountian bike this thing felt like a rocket. All gears worked perfectly with a very loud "Click" for each index change fo the seven speed cassette. The Cantilever brakes where a bit dodgy but I'll sort them out.


Posted by Picasa